Orange Sweet Potato Burgers (V)

Yesterday was the match between the Netherlands and Mexico during the WK 2014. So I decided to make sweet potato burgers. Orange and so perfect in theme! And I think it worked as the Netherlands won! Yeah!


Duration: 20 minutes

The ingredients for 1 serving:
  • Sweet potato of about 150 g
  • 15 g spelt flour
  • 1/2 egg
  • 1/4 ts cuminseed
  • 2 garlic cloves
  • 1 spelt or whole wheat bun
  • 1 tbs homemade garlic sauce
  • Handful arugula
  • Couple of onion rings
  • 200 g green beans
  • Olive oil

What you do:
  1. Cutthe ends of the beans and cook for 6 to 8 minutes in boiling water. 
  2. Peel the sweet potato and grate it coarsely. Squeeze the moisture out of the sweet potato grater and put it together with the flour, 1 clove garlic and cumin in a bowl. In another bowl whisk the egg. Put half of the egg in the bowl and mix well with your hands. Form 2 röstiburgers of the potato mixture. 
  3. Heat a splash of olive oil in a nonstick frying pan over high heat. When the oil is hot put the burgers in and immediately turn the heat to low. Press the burgers and fry 3 to 4 minutes per side until golden brown. 
  4. Drain the beans and cook for a few minutes in a frying pan with some olive oil and a crushed garlic clove. 
  5. Meanwhile, make the garlic sauce and cut the onion into rings. When the burgers are almost ready you can put the onion in the same pan and fry gently. 
  6. Cover the bottom half of the bun with arugula and then place the second röstiburgers on top. Add the garlic and onion rings on it and cover with the top of the rolls.

Enjoy!


Spinach Pancakes! (V)

It's Sunday and that means time for healthy pancakes! You all know  my standard banana-egg pancakes in different variations (chocolate chip, oatmeal, etc.). But on the Instagram of Gigigisele I often see spinach pancakes. And so I had to try and today was the day! Especially since I have not eaten as healthy and clean as usual because I was eating out a lot due to birthdays, dinnerparty's with work (hence also the lack of posts) so today I really want to eat clean with few carbs, so a bit like going 'back to the basics'.


Duration: 10 minutes

The ingredients for 1 serving:

  • 2 eggs
  • 1 ripe banana
  • Handful of spinach
  • 1/2 tbs dessicated coconut
  • 2 tbs oats
  • Olive oil

The ingredients for the topping:
  • 3 tbs Greek yoghurt
  • Handful of strawberries, blueberries and apple pieces (or any other fruit you prefer)
  • 1/2 tbs dessicated coconut

What you do:
  1. Beat the 2 eggs in a bowl and put them, together with the banana and spinach, in the blender and blend untill well mixed. Put back in a bowl and stir in the oats and coconut grater.
  2. Put a large non-stick pan on low to medium heat with a little bit of olive oil. When the oil is hot add the batter to the pan with a small 'sauce spoon'. The pancakes need to be small to make sure they don't break! As a guidance: you can make 3 small pancakes in one frying pan. Bake for a couple of minutes on low to medium heat (not to high because then they will burn!) on one side and then gently flip them over and bake for another minute or two on the other side.
  3. Put them on your plate with a bowl on top to make sure they stay warm whilst you make the second batch of pancakes. 
  4. I made a total of 8 pancakes and in between each set of 3 pancakes I put a tablespoon of Greek yoghurt. 
  5. While you bake the pancakes you need to cut the rest of the fruit and when the pancakes are done you sprinkle it over along with some dessicated coconut. 

Enjoy!


Tuna Pasta Salad with Fresh Pesto-Yoghurt Dressing

For today I have made a pasta with leftovers. It's such a waste to throw food away and in combination with a homemade arugula pesto it's super tasty and yet a budget meal.


Duration: 10 minutes

The ingredients for the arugula pesto:
  • 40 g arugula
  • 25 g Parmesan cheese
  • 1 garlic clove
  • 2 tbs pine nuts
  • 4 tbs extra virgin olive oil

The ingredients for 1 portion:
  • 75 g spelt or whole wheat pasta
  • 1/2 can of tuna
  • 1/2 can of peas
  • 1/2 can of corn
  • 1/2 sweet paprika
  • 1 tbs pine nuts
  • 1 tbs Parmesan cheese flakes
  • 2 tbs Greek yoghurt

What you do:
  1. Cook the pasta as directen on the package.
  2. In the meantime, start with making the arugula pesto by putting all the ingredients in your blender or food processor and mix until it's a smooth pasta. Put 1 heaped tablespoon of the pesto in a bowl with 2 tablespoons of Greek yoghurt and mix. Also roast the pine nuts and cut the paprika into small pieces.
  3. Drain the pasta and rinse with cold water. Mix in the corn, peas, paprika and tuna. Then stir in 1 to 2 tablespoons of the fresh pesto-yoghurt dressing. Sprinkle over the pine nuts and Parmesan Cheese flakes before you serve.
  4. As you can see I ate this the next day so I kept the dressing apart from the rest of the pasta. 

Enjoy!

Dates & Figs Raw Food Bar

Healthy and wholesome snacks, we are all searching for the perfect snack. But, sometimes, that can be a quite tricky. I always made my own raw food bar, but lately I got a little bored with my version, so it was time for a new one. Inspired by chef Erik te Velthuis, I have made a delicious bar ​​and it only took 10 minutes and it gives me a snack for 8 days!


The ingredients for 8 bars of 40 gram:

  • 150 g fresh dates
  • 50 g dried Spanish figs 
  • 25 g dried pear
  • 2 tbs dessicated coconut
  • 2 tbs quinoa flakes
  • 20 g almonds
  • 20 g hazelnuts
  • 10 g pecans

What you do:
  1. Remove the pits from the dates and and place in your food processor and grind finely until it's one stickly ball. 
  2. Cut the figs and pear into small pieces. Grind the nuts finely but not to fine as it's tasty when there are quite a few larger pieces of nut in it. Put the figs, pear and nuts in a big bowl together with the dates, 1 tbs grated coconut and the quinoa flakes in a bowl and mix with your hands till it's one solid whole. The dates make sure that everything will stick together. 
  3. Put a piece of parchment paper in a meat tray and place the date mixture. Fold the paper in half and press the mixture flat. Sprinkle both sides of the bar with the rest of the coconut grater so that the tape no longer sticks and cut into 8 equal pieces of about 40 g each.
  4. Save in your refrigerator so they set a little bit.


Enjoy!


Healthy French Toast part II

Yes it is real, healthy french toast! And they are delicious! I made this once before, but never again. No reason, it just wasn't in my system. But, Sunday morning, I didn't know for what I had an appetite and then I thought french toast! So made them and they were yummy! Certainly an improved version of the previous version. And I'm very happy with how the picture has become! I think they look really great!

And don't forget! Only today you have the opportunity to buy my E-Book with a 40% discount! So be quick!


Time: 10 minutes

The ingredients for 1 serving:
  • 2 or 3 slices of speltbread preferably a bit older bread  
  • 1 egg
  • 10 ml unsweetened almond milk
  • 1/2 ts cinnamon
  • 1/2 ts dessicated coconut
  • 1 heaped tbs quark or Greek yoghurt
  • 1/2 banana
  • Strawberries
  • Blueberries
  • Agave syrup to taste
  • Small piece of butter

Bereiding:
  1. Melt the butter in a frying pan on medium heat .
  2. Break the egg in a deep (soup) plate en whisk with the almond milk an cinnamon. Dip the slices of bread in the egg mixture and bake golden brown on both sides in a couple of minutes. In the meantime, cut the fruit.
  3. Serve the french toast with a tablespoon of quark or Greek yoghurt in the middle and the fruit on top. Finish it off with some dessicated coconut and some agave syrup to taste. 

Enjoy!

Blog Update & E-Book offer!

As you probably already have seen there is a separate Dutch & English website online with their own URLs! Yes! I am very proud and happy about it this!

You can visit the Dutch website through:  http://www.healthylivinginheels.nl/ 
And the English website through: http://www.healthylivinginheels.com/
Through the links in the sidebar on the right you can switch between the websites!

To celebrate this my E-Book: Clean Eating on Budget is available with a 40% discount only till 22th June! So that's only €5,95!!!

The E-Book contains 45 healthy and easy recipes which are all unique and not published on the website before! 


You can pay through paypal on the E-Book page on the blog or through bank transfer by sending an email to healthylivinginheels@hotmail.com


Restaurant Koetjes & Kalfjes

Yesterday I had dinner at the restaurant Koetjes & Kalfjes in Amsterdam after a succesfull PhD meeting (the end is in sight!).


You might wonder why I post a review of this restaurant on my blog? First, I really loved the food. And no, the restaurant is not known as a super healthy, organic restaurant with a perfect fit to 'clean eating'. But they do use solely fresh products. It is a place where many business people come for lunch, a drink or dinnerThe restaurant was nice decorated but personally I missed a bit of a cozy atmosphere but we did have fun!


Luuk and I both had the Chef's Special of the day: A tender piece of veal served on a bed of green and white asparagus with potato croquettes, and a slice of quiche. And honestly, this was the finest piece of meat that I have eaten in a while! You didn't have to use a knife as it was so very tender. Pepijn chose a rack of lamb, and he was also very pleased.


Of course, we had a nice bottle of wine and the dessert made it a perfect dinner! Of course I chose the 'Chocolate Delight'. Tasty, but very filling! Service was good and only for the piece of meat I would definitely go back here again if I'm having dinner after a meeting at the University.

Spring Couscous Salad (V)

I made this couscous salad ​​during my meal prep last Sunday because I had forgotten that today was Australia-Netherlands and the game started early at 6:00 p.m.. So I decided to work from home today because I didn't have any appointments and go to the gym from 4:00 p.m. till 5:00 p.m. and eat this delicious couscous salad on the couch while watching the game. The salad is both delicious hot or cold.

Want the Dutch recipe? Go to the Dutch website!


Duration: 10 mintes

The ingredients for 1 serving:

  • 100 g couscous
  • 1/2 can of corn
  • 1/2 can peas
  • 50 g green beans
  • 8 cherry tomatoes
  • 1 sweet paprika
  • 50 g feta cheese
  • 1 tbs freshly chopped parsley
  • Small piece of butter

What you do:
  1. I used beans I had left from my pasta salad with ham, if you don;t have this start with cleaning the beans and cook them for 8 minutes until tender. 
  2. Cook the couscous as directed on the package. When the couscous needs to well stir in a small piece of butter and the corn and peas. The butter give some more taste to the couscous.
  3. While everything is cooking cut the paprika and cherry tomatoes and stir through the couscous together with the beans when it is finished. Crumble feta cheese on top and eat the same day or store in the refrigerator for the next day (preservable for 3 days).

Enjoy!


Super Fried Eggs

What do you do when you work at home and actually have appetite for anything and everything? Right, you combine it in one dish! And it was supe tasty! Perfect actually. And thereby also a good basis for my workout this afternoon! Tonight is the Australia-Netherlands and that I can not miss, so I work at home allowing me to workout in the afternoon instead of the evening.

Ow and not unimportant! I have revived my healthy living in heels Twitter Account (Healthy_inHeels)! You will find facts, links to current hot topics in the media, what I eat in a day and other activities related to healthy living  inspiration, scientific facts related to what I do for a living (stimulating employees across different kinds of organizations to adopt an healthy lifestyle) motivation and many more stuff! So do not forget to follow and suggestions are welcome!

But now to this great combo with fried eggs!


Duration: 10 minutes

The ingredients for 1 serving:

  • 2 eggs
  • 2 spelt or whole wheat slices of bread
  • 1/2 avocado
  • Handful arugula
  • 1/2 tomato
  • 50 g smoked salmon
  • Cheese
  • Mayonaise
  • Salt & pepper
  • Butter

What you do:

  1. Melt the butter in a skillet over medium heat. Break the 2 eggs and fry about 5 minutes till 'cooked'. Against the end put a couple of slices of cheese on it and wait until they are melted. 
  2. Meanwhile, mash the avocado on the two slices of bread. Season with pepper, add the arugula and put two slices of tomato on top. Garnish with the salmon and place the fried eggs with cheese on top when they are ready. 
  3. Sprinkle with sea salt and a dab of mayonnaise per sandwich.

Enjoy!


Pasta Salad with Ham

It's my dad's birthday tomorrow! And therefore no bootcamp for me tomorrow. So I'm going to hit the gym tonight. To save some time I'm going straight from work and eating this delicious salad in the train because I just can't train without eating first.


Duration: 10 minutes

The ingredients for 1 serving

  • 65 g spelt or whole wheat pasta
  • 1 heaped tbs homemade red pesto
  • 100 g green beans
  • 1 red paprika
  • 8 cherry tomatoes
  • 100 g ham
  • handful argula
  • 50 g feta cheese

What you do:
  1. Clean the beans and cut off the ends and cut them in bite-sized pieces. Cook them along with the pasta for about 8 till 10 minutes till both are done. 
  2. In the meantime, cut the vegetables and ham and mix through the pasta along with the pesto when it's drained and done. Add the arugula when the pasta has cooled off en finish by crumbling over some feta cheese. 
  3. Keep in your refrigerator or eat straight away. 


Eetsmakelijk!

Mushroom Zucchini Risotto (V)

As you have probably seen by now I'm busy working on a separate Dutch and English website! I am really happy with this development but it is a lot of work and hence the lack of posts of the last couple of days. For now the Dutch recipes are still on this page but in time this will be removed. You can directly go to the Dutch page by clicking on the Dutch flag in the right sidebar.

Although I'm busy, after all the positive reactions to my risotto from yesterdat I couldn't wait with posting teh recipe. And to be honest, it was absolutely amazing so you should definitely make this sometime soon! Let me know if you liked it as much as I did. I made enough for 3 people so I could freeze 2 portions. Always handy, and I had enough vegetables so why not?!


Duration: 30 minutes

The ingredients for 3 servings:

  • 300 g risotto rice
  • 300 g chestnut mushrooms
  • 1 large zucchini
  • 1 large white onion
  • 5 garlic cloves
  • 2 vegetable stock cubes
  • 3 tbs grated Parmesan cheese and more to taste
  • small piece of butter
  • 20 g freshly chopped parsley
  • Olive oil
  • Salt & Pepper

What you do:
  1. Heat a splash of olive oil in a frying pan on medium-high heat and cook over a liter of water in the kettle. Meanwhile chop the onion. Put the onion together with 3 crushed garlic cloves in the pan and fry for about 3 minutes. Add the rice and fry along with the onion for another 1 to 2 minutes until the rice is translucent. Crumble over the stock cubes and add a dash of hot water. Stir well until it is absorbed by the rice. Reduce the heat and add another dash of water (not too much at a time) and continue until the rice is tender. This takes about 20 minutes, stirring frequently.
  2. Meanwhile, cut the mushrooms into quarters and the zucchini into cubes of your desired size. When the rice is cooking for about 10 minutes, heat up another splash of olive oil in a frying pan on medium to hight heat. Add the other 2 crushed garlic cloves and the mushrooms and zucchini and cook 5 to 7 minutes until tender.
  3. Turn of the heat when the rice is cooked and stir through the Parmesan cheese and butter. Stir the vegetables through and leave the lid on the pan for 3 minutes. I saved some vegetables to garnish the risotto with.
  4. Serve with freshly cut parsley sprinkled over it or stirred through.

Enjoy!

Hotspots: Yoghurt Barn

Charlotte komt graag bij de Yoghurt Barn! Zo ook voor haar verjaardag, dus hierbij een nieuw gastblog van Charlie's Kitchen! Binnenkort ook een hele eigen pagina op deze website, deze is nu nog 'under construction' dus hou het blog in de gaten! 


Charlie's Kitchen at Yoghurt Barn

28 mei was mijn verjaardag en mijn vriendinnen besloten me mee te nemen naar Yoghurt barn. Had er zal zoveel over gelezen en gehoord dus was ontzettend enthousiast om het nu eens zelf te gaan proberen!!
Het zaakje ziet er heel uitnodigend uit en heeft een goede sfeer, mijn aandacht werd meteen getrokken door al het lekkers wat ik zag liggen door de glazen balie. En ik ben gek op lekkers!!!!! Kwaliteit begint bij passie. Passie voor de natuur, lekker eten en genieten. Passie voor het pure. Zo is Yoghurt Barn ontstaan en een groot succes geworden. Ze willen het maximale uit yoghurt halen. Zodat wij kunt genieten. Daarom hebben  verschillende chef-koks unieke en overheerlijke Specials laten maken. Ik had de cookie special: soya met kiwi, kaneelsuiker, bastognekoekjes en noten. OHhhhh dat was zo overheerlijk. Natuurlijk kan je ook je eigen yoghurt samen stellen en deze meenemen voor onderweg. 


Dit vond ik zn ontzettend leuke tekst van de Yoghurt Barn en helemaal waar!
Onze beleving: iedereen eet yoghurt want het is lekker en gezond…
Onze filosofie: eerlijk duurt het langst. Onze yoghurt is biologisch en direct van de boer.
Onze intentie: waarom niet ook buitenshuis, op een leuke ontmoetingsplek?!

Ik raad het iedereen aan het is gezellig, lekker en biologisch! 

Yoghurt Barn heeft vestigingen in Utrecht en Amsterdam. Je kunt er terecht voor een Yoghurt on the Go, zakelijke bestellingen, een Barn picknick of Barn brunch, of een High Tea of High Choc


Volg Healthy Living in Heels ook op FacebookInstagramTwitterPinterestBloglovin of Google+!


Volg Charlie's Kitchen op Instagram!


 Wil je dit later terug lezen of delen met je vrienden? “PIN” me dan op PINTEREST of “SHARE” dit recept op FACEBOOK door gebruik te maken van de sociale media icoontjes hieronder (in het grijze kader)!

Mackerel Rice Salad

It's Tuesday! Which means Bootcamp time! I had some major food prepping going on yesterday. Made a breakfast jar with quark, banana and strawberries for breakfast, a chicken-paprika salad for lunch and this mackerel rice salad for dinner! So yes, three meals from jars and containers today.. It's not always nice to have breakfast and dinner in the train but otherwise I will just not be home in time for bootcamp so for now it will do and it makes sure that I have three healthy meals a day!


Scroll down for the Dutch recipe

English recipe:


Duration: 20 minutes

The ingredients for 1 serving:
  • 75 g brown basmati rice
  • 1/2 mackerel fillet
  • 1/4 cucumber
  • 100 green beans
  • 3 small carrots
  • 1/2 red paprika


What you do:
  1. Cook the rice according to the package. Cut the ends of the green beans and slice the carrots into thin slices. Put in a pan with half a liter of boiling water on the stove and cook for 8 minutes until the vegetables are tender. I did this last night while I was the wraps.  
  2. Meanwhile cut the cucumber, paprika and mackerel into pieces.  
  3. Drain the beans, carrots and rice and let it cool. Mix the rest of the ingredients through the cooled rice and vegetables and store in the refrigerator in an airtight container.

Enjoy!


Follow Healthy Living in Heels on FacebookInstagramTwitterPinterestBloglovin or Google+

  Do you want to make me later or share me with your friends? “PIN” me to PINTEREST or “SHARE” me on FACEBOOK, using the social media icons below (in the gray frame)!

................................................................................................................

Nederlands recept - Makreel Rijst Salade :


Tijd: 20 minuten

De ingrediënten voor 1 portie:
  • 75 g bruine basmati rijst
  • 1/2 makreel filet
  • 1/4 komkommer
  • 100 g sperziebonen
  • 3 kleine wortels (bospenen)
  • 1/2 rode paprika

Bereiding:
  1. Kook de rijst zoals aangegeven op de verpakking. Snijd de uiteinden van de sperziebonen en de wortels in dunne plakjes. Doe in een pan met een halve liter kokend water en kook ze in 8 minuten gaar. Ik heb dit gisteravond gedaan terwijl ik de wraps aan het maken was. 
  2. Snijd ondertussen de komkommer, paprika en makreel in stukjes.
  3. Giet de boontjes, wortels en rijst af en laat afkoelen. Meng de rest van de inmiddels gesneden ingrediënten erdoorheen en bewaar in de koelkast in een luchtdichte bak.

Eet smakelijk!


 Volg Healthy Living in Heels ook op FacebookInstagramTwitterPinterestBloglovin of Google+!

Wil je dit recept later maken of delen met je vrienden? “PIN” me dan op PINTEREST of “SHARE” dit recept op FACEBOOK door gebruik te maken van de sociale media icoontjes hieronder (in het grijze kader)!

Beef Wraps

My parents came for dinner again so I decided to make wraps with beef because it's easy an you just can't go wrong. It's a cheatmeal for me due to the melted cheese and the beef (which I almost never eat) but enjoyed every bite and to be honest, it's not a really big cheat! So the recipe today is for 4 persons! We ate with the three of us and the remaining two wraps will be kept in the refrigerator so I can save some money!


 Scroll down for the Dutch recipe

English recipe:


Duration: 20 minutes

The ingredients for 4 persons:
  • 8 whole wheat wraps 
  • 500 g minced beef 
  • 1 white onion 
  • 1 can of corn 
  • 300 g green beans 
  • 2 tomatoes 
  • 3 tbs sweet paprika powder
  • 1 ts cumin 
  • grated cheese 
  • 1 bowl of salsa sauce mild or hot 
  • 1 bowl of sour cream 
  • 1 bowl of homemade guacamole 
  • sunflower oil 
  • Salt & Pepper


What you do:
  1. Preheat the oven to 200 degrees of Celsius. Cut the ends of the beans, cut them in half and cook for 8 minutes until they are tender. 
  2. Heat a tablespoon of sunflower oil in a pan over high heat. Add the ground beef and loose until done. Meanwhile, cut the onion into small pieces and put it with the beef in the pan when it's halfway done.
  3. When the beef is done, add the paprika powder and cumin seeds with a small splash of water and the corn. Let it stand for a few minutes on low heat. Stir in the beans when they are ready. 
  4. Meanwhile, cut the tomatoes into small cubes. Place the wraps on the work surface and divide the meat mixture over it. Sprinkle some chopped tomatoes on each wrap, fold them and fasten with a toothpick. 
  5. Place the wraps in a greased baking dish, sprinkle with lots of cheese and put in the oven for about 10 minutes until the cheese is melted. 
  6. When the wraps are in the oven, you can put the salsa and sour cream in cute bowls and make the guacamole.

Enjoy!


Follow Healthy Living in Heels on FacebookInstagramTwitterPinterestBloglovin or Google+

  Do you want to make me later or share me with your friends? “PIN” me to PINTEREST or “SHARE” me on FACEBOOK, using the social media icons below (in the gray frame)!

................................................................................................................

Nederlands recept - Wraps met Rundergehakt:


Tijd: 20 minuten

De ingrediënten voor 4 personen:
  • 8 volkoren wraps
  • 500 g rundergehakt
  • 1 witte ui
  • 1 blikje mais
  • 300 g sperziebonen
  • 2 tomaten
  • 3 el zoete paprika poeder
  • 1 tl komijn
  • geraspte kaas
  • 1 schaaltje salsa saus mild of hot
  • 1 schaaltje zure room
  • 1 schaaltje zelfgemaakte guacamole
  • Zonnebloemolie
  • Peper & Zout
Bereiding:
  1. Verwarm de oven voor op 200 graden Celsius. Snijd de uiteinden van de boontjes, halveer ze en kook in 8 minuten gaar.
  2.  Verwarm een eetlepel zonnebloemolie in een hapjes pan op hoog vuur. Voeg het gehakt toe en rul totdat het gaar is. Snijd ondertussen de ui in stukjes en doe deze er halverwege bij. 
  3. Wanneer het gehakt gerult is doe je de paprika poeder en komijnzaad erbij met een klein scheutje water en de mais. Laat nog een paar minuten op laag vuur staan. Roer de sperziebonen erdoorheen wanneer deze klaar zijn. 
  4. Snijd ondertussen de tomaten in kleine blokjes. Leg de wraps op het werkblad en verdeel het gehakt mengsel erover heen. Strooi over elke wrap wat tomatenblokjes, vouw ze dicht en zet vast met een prikker. 
  5. Leg de wraps in een ingevette ovenschaal, bestrooi met lekker veel kaas en zet zo'n 10 minuten in de oven zodat de kaas lekker gesmolten is.
  6. Wanneer de wraps in de oven staan kun je de salsa en zure room in leuke schaaltjes op tafel zetten en de guacamole maken. 

Eet smakelijk!


 Volg Healthy Living in Heels ook op FacebookInstagramTwitterPinterestBloglovin of Google+!

Wil je dit recept later maken of delen met je vrienden? “PIN” me dan op PINTEREST of “SHARE” dit recept op FACEBOOK door gebruik te maken van de sociale media icoontjes hieronder (in het grijze kader)!

Vegetarian Zucchini Pizza's

So tonight I decided to make a simple dinner with stuff I had left in my refrigerator and freezer to save some money! And it turned out delicious. Had a zucchini and some wok vegetables in my freezer from 2 weeks ago. Defrosted it and used it in this delicious meal!


 Scroll down for the Dutch recipe

English recipe:


Duration: 5 minutes + 20 minutes oven

The ingredients for 1 serving:
  • 1 zucchini
  • 200 g Italian wok vegetables
  • 2 ts tomato paste
  • 1/2 ts oregano
  • grated 30+ cheese


What you do:
  1. Preheat the oven to 200 degrees of Celsius. Cut the ends of the zucchini and cut them in half lenghtwise. 
  2. Put the tomato paste on top and sprinkle over the oregano. Divide the wok vegetables over both halves and sprinkle with the grated cheese.
  3. Put in your preheated oven for 20 minutes. 

Enjoy!


Follow Healthy Living in Heels on FacebookInstagramTwitterPinterestBloglovin or Google+

  Do you want to make me later or share me with your friends? “PIN” me to PINTEREST or “SHARE” me on FACEBOOK, using the social media icons below (in the gray frame)!

................................................................................................................

Nederlands recept - Vegetarische Courgette Pizza's:


Tijd: 5 minuten + 20 minuten oventijd

De ingrediënten voor 1 portie:
  • 1 courgette
  • 200 g Italiaanse wokgroenten
  • 2 tl tomatenpuree
  • 1/2 tl oregano
  • geraspte 30+ kaas
Bereiding:
  1. Verwarm de oven voor op 200 graden Celsius. Snijd de uiteinden van de courgette en snijd deze in de lengte door de midden.
  2. Besmeer met de tomatenpuree en strooi de oregano eroverheen. Verdeel de wokgroenten over beide helften en bestrooi met de kaas.
  3. Zet in het midden van de voorverwarmde oven voor 20 minuten.

Eet smakelijk!


 Volg Healthy Living in Heels ook op FacebookInstagramTwitterPinterestBloglovin of Google+!

Wil je dit recept later maken of delen met je vrienden? “PIN” me dan op PINTEREST of “SHARE” dit recept op FACEBOOK door gebruik te maken van de sociale media icoontjes hieronder (in het grijze kader)!

Couscous salad with grilled chicken

So yesterday was a super hectic day! It was busy at the office and after work I went straight to the gym rocking my new gym clothes! But I was home very late and it had been a long day. I ate in the train and made this delicious couscous salad the day before. But today on Friday I still had left overs so I decided to eat it again and also post the recipe because it was so good!


 Scroll down for the Dutch recipe

English recipe:


Duration: 15 minutes

The ingredients for 1 serving:
  • 100 g couscous 
  • 100 g broad beans 
  • 1/2 chicken breast (grilled) 
  • 1/2 red paprika
  • 1/2 sweet paprika
  • 50 g feta cheese 
  • fresh mint


What you do:
  1. Cook the couscous as directed on the package. Meanwhile, cut the paprikas into pieces and shred the fresh mint. Stir the beans, paprika and mint through the couscous when it is ready. 
  2. I had grilled chicken left from my delicious Italian chicken burgers. So this saved me a lot of time. Should you have to grill the chicken right now, do this straight after you started with the couscous. Directions are as follows:
    • Put the chicken on a cutting board with a piece of plastic wrap over it and turn the chicken flat with a rolling pin. Sprinkle with salt and pepper on both sides and coat with olive oil. 
    • Put a grill pan over high heat and place the chicken on it when the pan is hot. Cook for 2 minutes on each side, then turn the heat to medium-high heat and cook the chicken in 8 cooked. 
  3. Slice the grilled chicken into pieces and add to the couscous and crumble over the feta cheese. 
  4. I ate the couscous cold on the next day but you can also eat it straight away

Enjoy!


Follow Healthy Living in Heels on FacebookInstagramTwitterPinterestBloglovin or Google+

  Do you want to make me later or share me with your friends? “PIN” me to PINTEREST or “SHARE” me on FACEBOOK, using the social media icons below (in the gray frame)!

................................................................................................................

Nederlands recept - Couscous salade met gegrilde kip:


Tijd: 15 minuten

De ingrediënten voor 1 portie:
  • 100 g couscous
  • 100 g tuinbonen
  • 1/2 kipfilet (gegrild)
  • 1/2 rode paprika
  • 1/2 zoete punt paprika
  • 50 g feta kaas
  • verse munt

Bereiding:
  1. Kook de couscous zoals aangegeven op de verpakking. Snijd ondertussen de paprika in stukjes en de versnipper de verse munt. Roer de tuinbonen, paprika en munt door de couscous wanneer deze klaar is.
  2. Ik had gegrilde kip over van mijn heerlijke Italiaanse kipburgers. Dus dit scheelde een hoop tijd. Moet je wel nog de kip grillen dan begin je hier gelijk mee als de couscous op staat en het gaat als volgt:
    • Leg de kipfilet op een snijplank met een stuk huishoudfolie eroverheen en sla de kipfilet plat met een deegroller. Bestrooi met zout en peper aan beide kanten en smeer in met wat olijfolie.
    • Zet een grillpan op hoog vuur en leg de kip hierop wanneer de pan heet is. Bak 2 minuten aan beide kanten en draai dan het vuur naar matig tot hoog vuur en gril de kip in 8 gaar. 
  3. Snijd de gegrilde kip in stukjes, voeg toe aan de couscous en verkruimel de feta kaas eroverheen. 
  4. Ik heb de couscous koud gegeten omdat ik de couscous salade de dag erna op heb gegeten in de trein op weg naar de sportschool vanuit werk maar je kan hem natuurlijk ook gelijk op eten!

Eet smakelijk!


 Volg Healthy Living in Heels ook op FacebookInstagramTwitterPinterestBloglovin of Google+!

Wil je dit recept later maken of delen met je vrienden? “PIN” me dan op PINTEREST of “SHARE” dit recept op FACEBOOK door gebruik te maken van de sociale media icoontjes hieronder (in het grijze kader)!

Looking Back at May

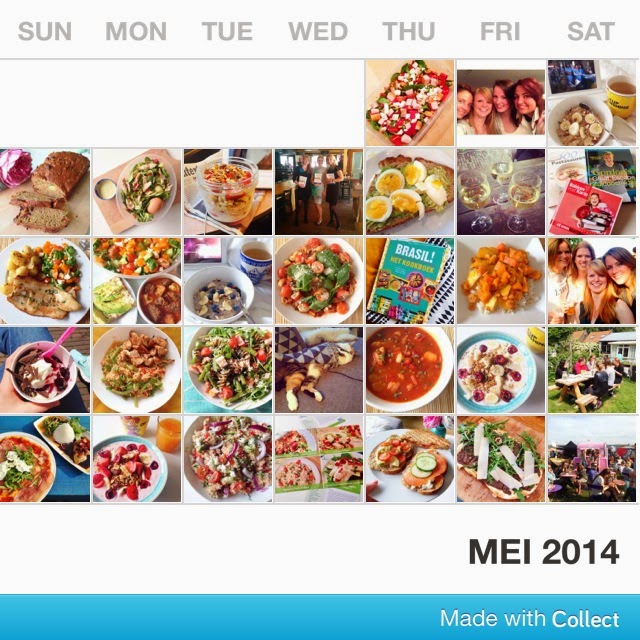
After all the positive reaction to my Looking Back at April post I decided to keep doing this. So here is May! Love how colourful the whole month turned out.


May was all about getting accustomed at my new job and finding a new balance between work, cooking and working out. Made a lot of new meals and posted a lot of recipes. But my favorite of this month is my Tomatopilav with spicy chicken and my Firm Meal Size soup with Pangasius fillet! I normally just don't make soup because I think it's a lot of work but this day I had to because my wishdom teeth were extracted the day before so soup was the only thing I could eat. As I don't like the store bought soups with all the food additives I made my own and was suprised by how good it turned out! Definitely going to make this more often!


And what other stuff happened this month? Well on May 7th my old roommate and collegue Linda defended her thesis and I was her paranimf. I'm really proud of her that she accomplished this and is now officially doctor and I can't wait till I can defend my thesis as well! Also got a lot of new cook books of which I'm eager to make some recipes from! My favorite this month is the cookbook: Brasil. It brings back memories from my holiday and I already made a recipe from it which was perfect: the fresh chicken with lime and garlic. The weekends were fun and relaxed. Had a housewarming and birthday party of two friends, some drinks with colleagues and in the third weekend it was 'Bokketocht' in Zaandam (were I live) which basically means, catching up with friends while riding your bicycle from bar to bar and drinking a beer (bokbiertje) before you go to the next one. It's always a lot of fun!


Then in the fourth weekend we had the Lizz is More Vitality Event at which I prepared the lunch, luckely everything went great and it was an inspirational day. Afterwards I went to the Toppers in Concert (a Dutch music event) with my parents and brother. On sunday I had a babyshower and afterwards I went to my favorite place with Ellen: Aloha Wijk aan Zee. I had a pizza at the beach and just relaxed and prepared for a new week of work after a very busy weekend. So I deserved my cheatmeal!

Sunday Dinner at the Beach at Aloha Wijk aan Zee

The last week of May it was super busy at work because we only had 3 days of work due to hemelvaart. I also received the recipe cards that were made of which I'm really proud! On Friday we were all still free so I went to Amsterdam with Charlotte to do some shopping and trying out a new healthy lunch place: Lavinia Good Food! It was perfect and I would highly recommend this to anybody who is going to visit Amsterdam any time soon! On Saturday, the last day of May I went to 'het weekend van de rollende keukens' in Amsterdam which is a Food festival! Had a super fun day and definitely going to go back there next year.

The Weekend of the Rolling Kitchens

So that was May! Curious to see what June will bring me and hoping the weather will be good and there is time to visit the beach!

Surimi Salad

I had some surimi sticks left over from last weeks delicious sea food pizza! So made a delicious sandwich with them with cucumber and cottage cheese but had more so decided to make a lunch salad with it! Perfect!

I received some questions about what surimi is. Well it's literally "ground meat" and refers to a paste made from fish or other meat and its a primary ingredient in Asian foods. I used crab sticks which is made of lobster, crab and other shellfish.


 Scroll down for the Dutch recipe

English recipe:


Duration: 5 minutes

The ingredients for 1 serving:
  • 75 g corn salad 
  • 1 boiled egg 
  • 1 avocado 
  • 6 surimi sticks 
  • 6 cherry tomatoes 
  • 1/4 cucumber 
  • 1 tbs toasted pine nuts 
  • Dressing: extra virgin olive oil with white wine vinegar 
  • Optional: pieces of mozzarella


What you do:
  1. Very simple. Cut the cherry tomatoes into wedges and cucumber and surimi sticks into pieces. Toast the pine nuts and mix the dressing in a separate bowl. Put all ingredients on a plate or in an airtight container. Are you going to eat it immediately? Then peel the egg and avocado and add to the salad. Preparing your salad for tomorrow? Put the egg and avocado in the container and cut and peel them when you're ready to eat the next day. Sprinkle the pine nuts over it and serve with the dressing or store in the refrigerator.

Enjoy!


Follow Healthy Living in Heels on FacebookInstagramTwitterPinterestBloglovin or Google+

  Do you want to make me later or share me with your friends? “PIN” me to PINTEREST or “SHARE” me on FACEBOOK, using the social media icons below (in the gray frame)!

................................................................................................................

Nederlands recept - Surimi Salade:


Tijd: 5 minuten

De ingrediënten voor 1 portie:
  • 75 g veldsla
  • 1 gekookt ei
  • 1 avocado
  • 6 surimi sticks
  • 6 cherrytomaatjes
  • 1/4 komkommer
  • 1 el geroosterde pijnboompitten
  • Dressing: extra vierge olijfolie met witte wijn azijn
  • Optioneel: stukjes mozzarella
Bereiding:
  1. Heel simpel. Snijd de cherrytomaatjes in partjes en de komkommer en surimi sticks in stukjes. Rooster de pijnboompitten en meng de dressing apart in een kommetje. Doe dan alle ingrediënten op een bord of in een luchtdichte bak. Eet je hem direct, pel dan het ei en de avocado en voeg toe aan de salade. Eet je de salade morgen? Doe deze dan los erbij in de bak en doe er pas bij wanneer je gaat eten. Strooi de pijnboompitten eroverheen en serveer met de dressing of zet in de koelkast. 

Eet smakelijk!


 Volg Healthy Living in Heels ook op FacebookInstagramTwitterPinterestBloglovin of Google+!

Wil je dit recept later maken of delen met je vrienden? “PIN” me dan op PINTEREST of “SHARE” dit recept op FACEBOOK door gebruik te maken van de sociale media icoontjes hieronder (in het grijze kader)!

Italian Style Chicken Burger

My mom and dad came over for dinner tonight because they received the key to their new home so they were busy preparing for the painters tomorrow. As I have to work and can't help them move or anything I helped by cooking a meal for them so my mom doesn't have to spend a lot of time in the kitchen after a busy day. Choose to make italian style chicken burgers and served it with baked potatoes (because I know my parents like this) and a salad.


 Scroll down for the Dutch recipe

English recipe:


Duration: 15 minuten

The ingredients for 1 serving:
  • 1 small chicken breast 
  • 1/2 tsp oregano 
  • 2 slices of mozzarella 
  • 2 tomato slices 
  • 1 spelt bun
  • 1 tbs red pesto 
  • Arugula 
  • Salt & Pepper 
  • Olive oil


What you do:
  1. Put the chicken on a cutting board with a piece of plastic wrap over it and turn the chicken flat with a rolling pin. Sprinkle with salt and pepper on both sides and coat with olive oil. 
  2. Put a grill pan over high heat and place the chicken on it when the pan is hot. Cook for 2 minutes on each side, then turn the heat to medium-high heat and cook the chicken in 8 cooked. When the chicken is just cooked you put a slice of mozzarella and oregano on it and let the chicken there for a moment (possibly inverted pan on it then it goes faster) until the mozzarella begins to melt. 
  3. Meanwhile Spread the bread with red pesto. Put the arugula and tomato slices on it, followed by the chicken when it is ready. 
  4. Serve with baked potatoes for example, and a salad.

Enjoy!


Follow Healthy Living in Heels on FacebookInstagramTwitterPinterestBloglovin or Google+

  Do you want to make me later or share me with your friends? “PIN” me to PINTEREST or “SHARE” me on FACEBOOK, using the social media icons below (in the gray frame)!

................................................................................................................

Nederlands recept - Italiaanse Kip Burger:


Tijd: 15 minuten

De ingrediënten voor 1 portie:
  • 1 kleine kipfilet
  • 1/2 tl oregano
  • 2 mozzarella plakjes
  • 2 tomaten plakjes
  • 1 spelt bolletje
  • 1 el rode pesto
  • Rucola
  • Peper & Zout
  • Olijfolie

Bereiding:
  1. Leg de kipfilet op een snijplank met een stuk huishoudfolie eroverheen en sla de kipfilet plat met een deegroller. Bestrooi met zout en peper aan beide kanten en smeer in met wat olijfolie.
  2. Zet een grillpan op hoog vuur en leg de kip hierop wanneer de pan heet is. Bak 2 minuten aan beide kanten en draai dan het vuur naar matig tot hoog vuur en gril de kip in 8 gaar. Wanneer de kip net gaar is leg je een plakje mozzarella en de oregano erop en laat je de kip nog even staan (eventueel met pan omgekeerd erop dan gaat het sneller) totdat de mozzarella begint te smelten.
  3. Besmeer ondertussen het broodje met rode pesto. Leg de rucola erop en de plakjes tomaat gevolgd door de kip wanneer deze klaar is.
  4. Serveer bijvoorbeeld met gebakken aardappeltjes en een salade.

Eet smakelijk!


 Volg Healthy Living in Heels ook op FacebookInstagramTwitterPinterestBloglovin of Google+!

Wil je dit recept later maken of delen met je vrienden? “PIN” me dan op PINTEREST of “SHARE” dit recept op FACEBOOK door gebruik te maken van de sociale media icoontjes hieronder (in het grijze kader)!

Het Weekend van de Rollende Keukens


Dit weekend was het weekend van de rollende keukens op het terrein van de westergasfabriek in Amsterdam. Als foodie en foodblogger kon ik dit event natuurlijk niet aan mij voorbij laten gaan! 

Ik ben op zaterdag geweest. Het was druk, maar erg gezellig en heb een toptijd gehad! Het was dan ook heerlijk weer dus wat wil je nog meer? Echt heerlijk eten met een drankje in de zon. Volgend jaar ga ik zeker weer en ben jij nog niet geweest? Je kan vandaag nog tot 23.00! Dus ik zou zeggen spring op de fiets of pak de trein en ga snel naar Amsterdam! Hieronder vind je een ruime sfeerimpressie van mijn dag!


Heb je hier nog nooit van gehoord dan hoor ik je vragen maar wat is dat? Het is een 5-daags food festival waarbij tientallen mobiele eetgelegenheden zich verenigen tot één heel groot openluchtrestaurant met verschillende bandjes en één en al gezelligheid! Je kunt het zo gek niet bedenken of het is er. Altijd al eens gefrituurde sprinkhaan of een meelworm-loempia willen proberen? Dat kan hier! Maar vanuit alle wereldstreken kun je gerechten en hapjes proeven. Van gezond tot ongezond, er is voor ieder iets wils. Alles ruikt even lekker en de smaken van de dingen die ik heb geproeft waren stuk voor stuk fantastisch! Er zijn kleinere en grotere 'restaurantjes'. Er wordt gekookt vanuit caravans, barbeque's, drankjes kun je halen bij de bar en je kunt zitten op picknicktafels of heerlijk in het gras. 


Ordering Chicken Fajita's at a mexican style caravan

And here is the delicious chicken fajita with a mango lemonade
Healthy Food Stand with Raw Food and Acai Recipes

The best barbeque Beef Balls from Smokey Goodness
Cheatmeal! Crepes with Nutella


Volg Healthy Living in Heels ook op FacebookInstagramTwitterPinterestBloglovin of Google+!


 Wil je dit later terug lezen of delen met je vrienden? “PIN” me dan op PINTEREST of “SHARE” dit recept op FACEBOOK door gebruik te maken van de sociale media icoontjes hieronder (in het grijze kader)!